
How To Make Braided Pesto Bread

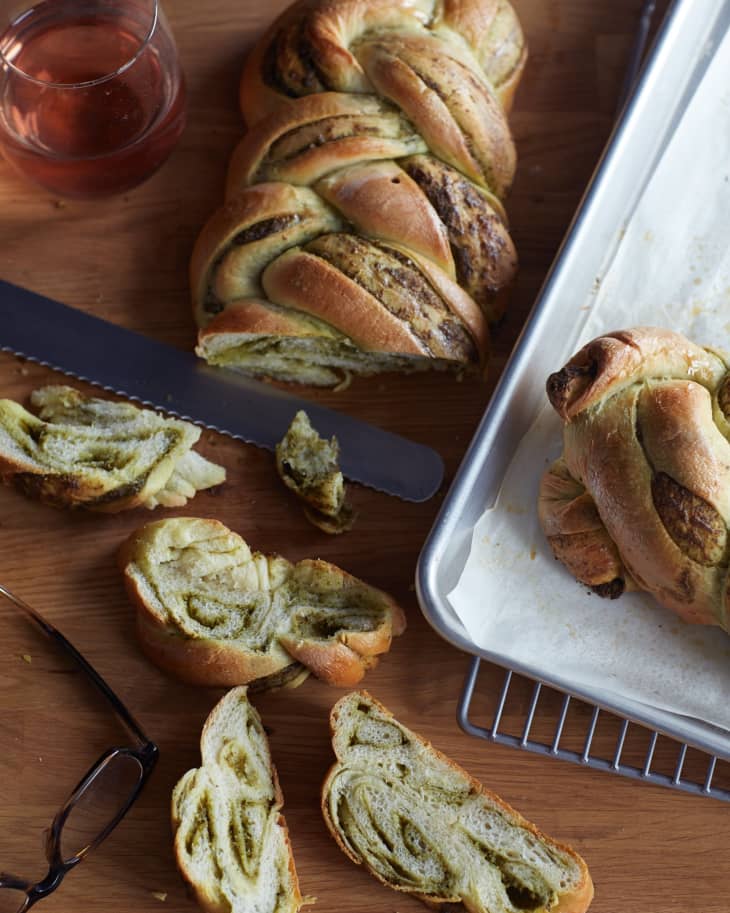
This is a bread to impress. Impress your family or guests with the beautiful braids and striations. Impress them with an invitingly complex fragrance of yeast and herbs. Impress them with delicate texture. Impress them most of all with the powerful burst of spring pesto that ripples throughout this bread. If you’re up for an afternoon of baking, add this gorgeous loaf to your weekend to-do list.
This bread is an all-day project, but the results are simply stunning. Make sure to look at the pictures and read the recipes through — not once, but twice — before you start, so you have a mental image of what you will be doing. Now, after you do that, don’t be intimidated. Follow the directions and pictures, pay attention, and you’ll be accepting accolades by nightfall.
A Pesto Made for Baking
This bread doesn’t use an average pesto recipe. It is far thicker and richer in cheese and nuts than most pestos. That’s because it has a different job; it needs to spread over the bread dough like a thick paste and stay in place while we roll, slice, and braid.
A Perfect Pesto for Pasta, Sandwiches, and Dip: How To Make Perfect Pesto Every Time
Once you get the hang of the super-thick consistency and unusually strong taste of the pesto for this recipe, go ahead and have some fun.
Substitute fresh Italian flat-leaf parsley or baby arugula for the basil, or try lemon basil and purple basil instead. You can also play with the type of nuts used, but please use skinless nuts to avoid adding any unpleasant bitterness. Substitute half of the Parmesan with grated aged Romano, aged Asiago, or a well-aged ricotta salata — as long as it’s a dry Italian cheese for grating, you will be fine. Add a pinch of fresh oregano, marjoram, or red pepper flakes. Obviously, each of the changes will alter the taste, but as long as the texture of the pesto is the same— super thick and not too watery — the bread will be delicious.

Waking Up the Yeast
Yeast is alive, although it comes to us deactivated and in hibernation. Our job is to awaken it so it can do its many tasks in the bread. No matter what type of dry yeast you use — and there are many varieties of those little packets — yeast needs special handling. You need warm — not hot, not cold — water to activate yeast and get it started eating and bubbling and releasing gases. Here’s the warning: If the water is too warm, you’ll kill the organisms before they get a chance to do their jobs. Every pastry chef, cookbook writer, and food scientist I have ever met, read, or seen has his or her own “magic” temperature and a thoughtful rationale. I suggest using a range that is both forgiving and makes sure those yeast won’t get overheated — between 85°F and 100°F. Use your body temperature (98.6°) as an indicator if you don’t have a thermometer. This simply means it really won’t feel hot at all (if it is too hot, let it cool a bit before adding the yeast).
Allow the yeast to bubble to check if it’s working; that is what the first five or so minutes of a bread recipe is doing — proofing the yeast.
More on Yeast
Tool of the Trade
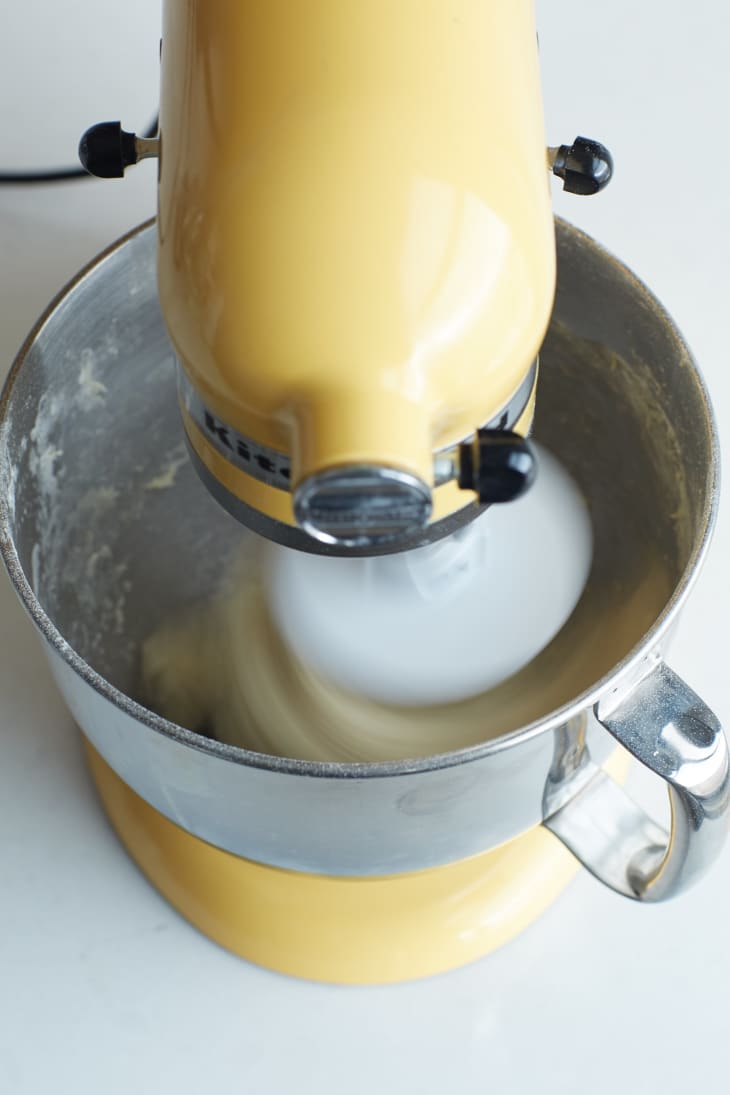
Recipes for breads call for stand mixers – bulky, heavy, pricey stand mixers. Sorry to say this, but handheld electric mixers are not an alternative when making bread. A hand mixer just can’t stand the weight of the bread.
You can, technically, make all bread by hand, but after years of teaching, I can say this in all honesty: Most (if not all) home cooks and even professionals who aren’t bread bakers have a lot of trouble making bread by hand with successful, consistent results. The stand mixer solves that every time.
You can, however, make this bread dough in a very heavy-duty food processor, using the dough blade.
The First Rise
Many breads can have their first rise in one of two ways: either covered and left in a quiet part of a kitchen, or covered and refrigerated overnight. Both methods work for this dough. If you refrigerate, make sure to allow the dough to come to room temperature before rolling, filling, and shaping.

If You Can Braid Hair, You Can Braid Dough
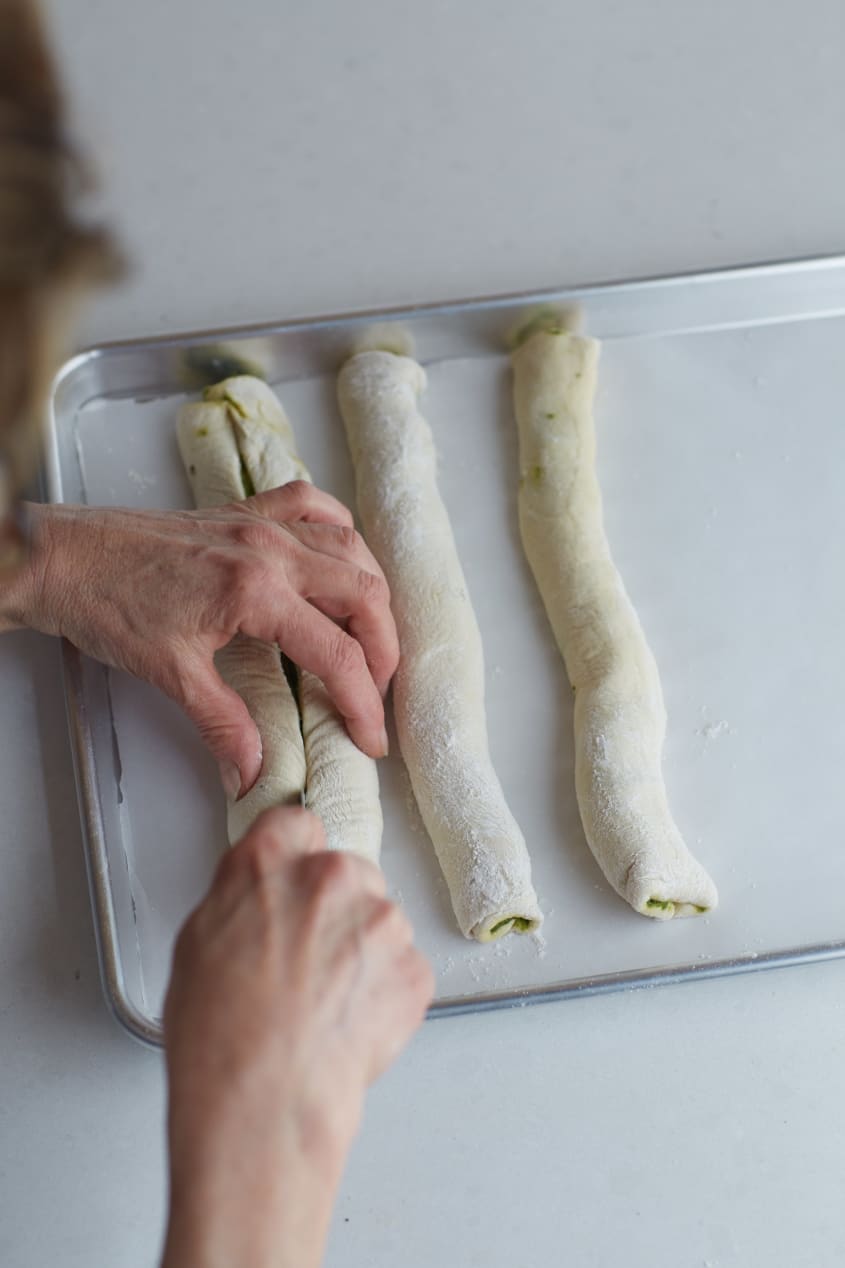
You are breaking this dough into three sections. Each section is rolled into a rectangle, filled with pesto (not quite to the edge), and then rolled into a tube, like a jelly roll. These tubes are strands to be braided. The logistical difference between these tubes and any other strands that get braided (like challah or wreath breads) is that if you press hard, pesto will come out the ends. Be gentle. Start braiding on one end, turning the dough around, and finish the braid from the other side.
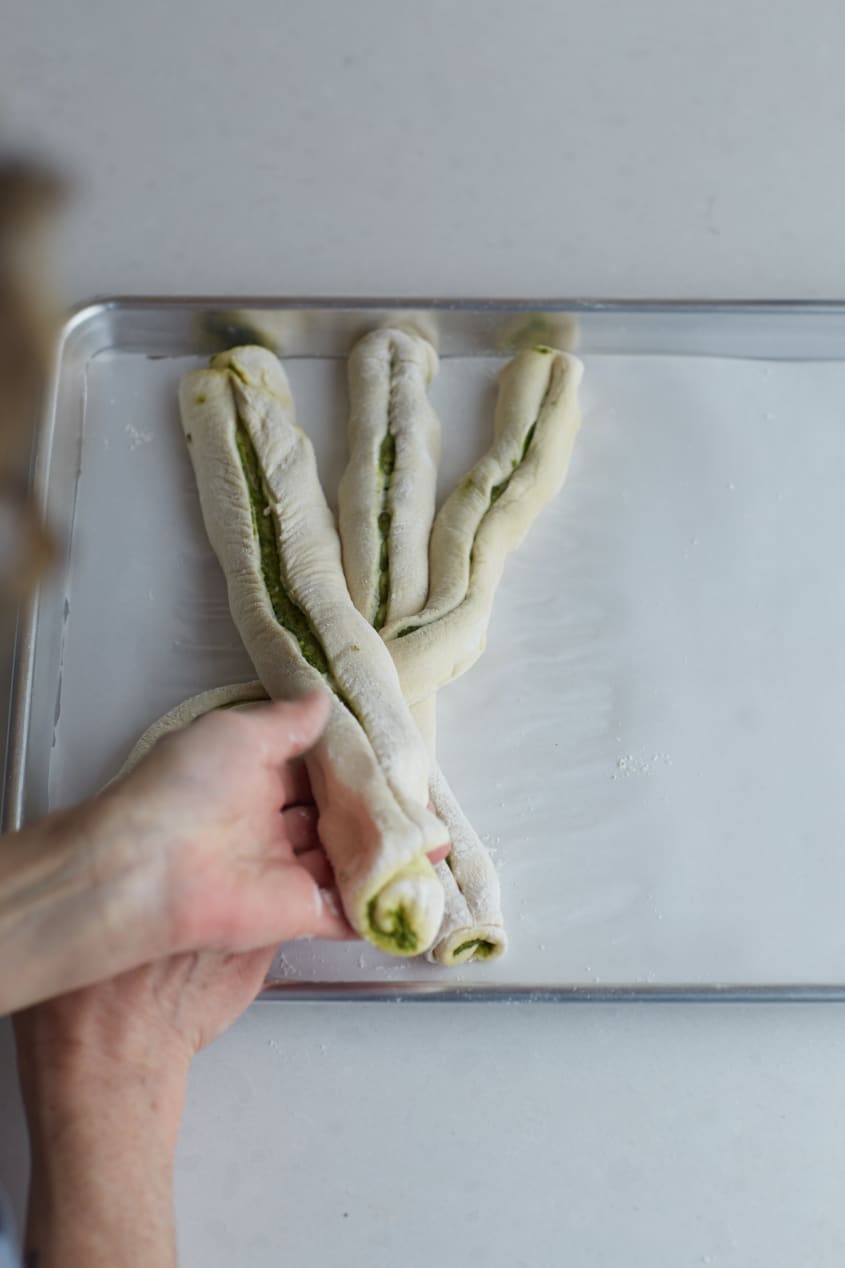
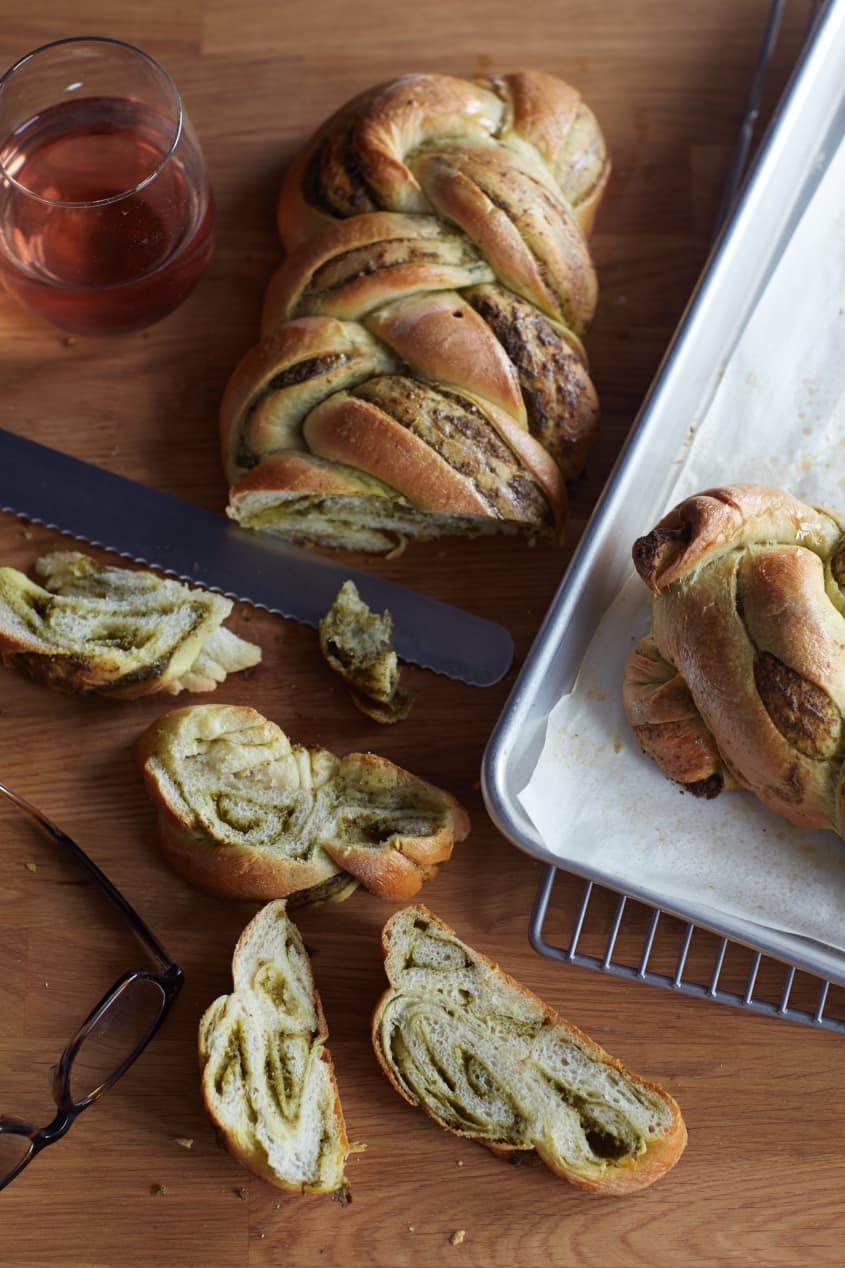
The curious part of this recipe is the slit down each tube. The technique is derived from a fancy Russian bread technique. The Russian bread is usually made from two, not three, strands that are very simply folded over each other, and formed into a wreath or a snail shape. This recipe uses the technique of slitting before braiding. It makes lots of the lovely pesto visible and allows it to cook on top as well as inside, giving some lovely textural differences to this bread.


How To Make Braided Pesto Bread
Makes 2 loaves
Nutritional Info
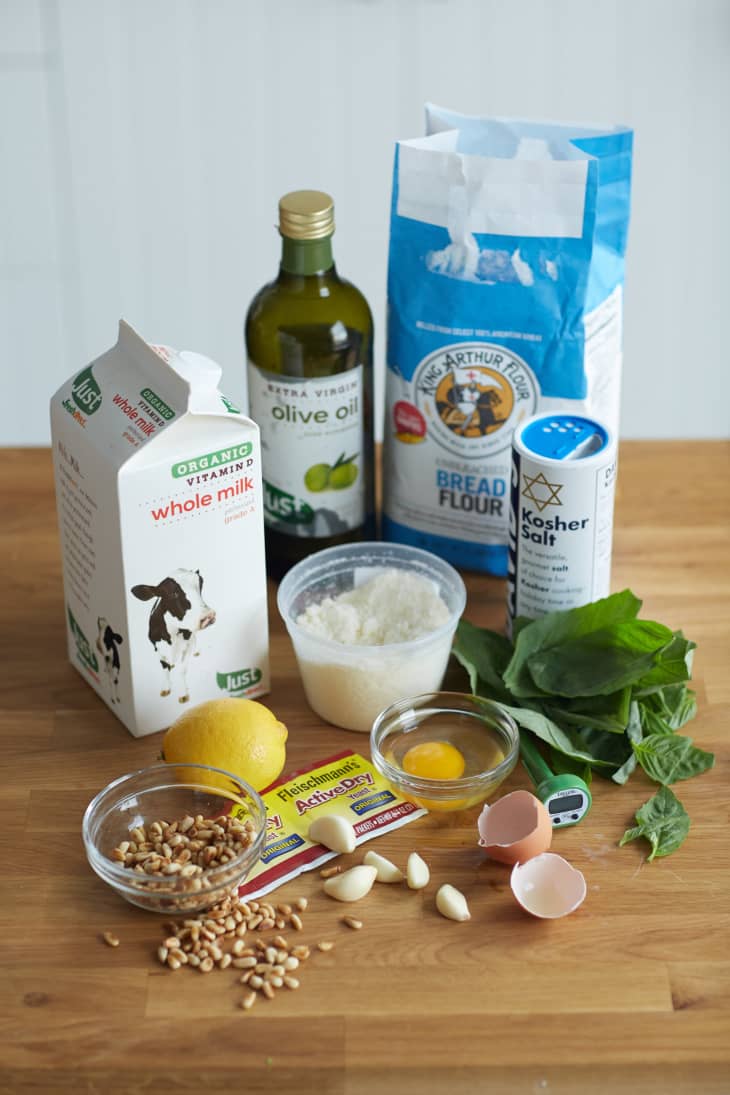
Ingredients
For the bread:
- 3/4 cup
warm water
- 2
(1/2-ounce) packages (4 1/2 teaspoons) active-dry yeast
- 1 tablespoon
sugar
- 3/4 cup
milk
- 4 cups
bread flour, plus more for dusting
- 1 tablespoon
kosher salt
- 1/3 cup
olive oil
- 1
large egg
- 1 teaspoon
water
For the pesto:
Leaves and soft stems from 2 small bunches fresh basil (about 2 1/2 cups)
- 5 cloves
garlic, peeled and grated, any green centers discarded
- 1 1/2 cups
grated Parmesan, Parmigiano Reggiano preferred
Zest of 1 medium lemon (about 2 teaspoons)
- 2 ounces
(1/2 cup) toasted pine nuts (pignolis)
- 1/2 cup
extra-virgin olive oil
Equipment
Silicone spatula
Stand mixer fitted with a paddle attachment
Instant-read thermometer
Saucepan
Mixing bowl
Plastic wrap
Kitchen towels
Baking sheet or sheet pan
Parchment paper or nonstick silicone mat/pad
Pastry brush
Sharp knife
Instructions
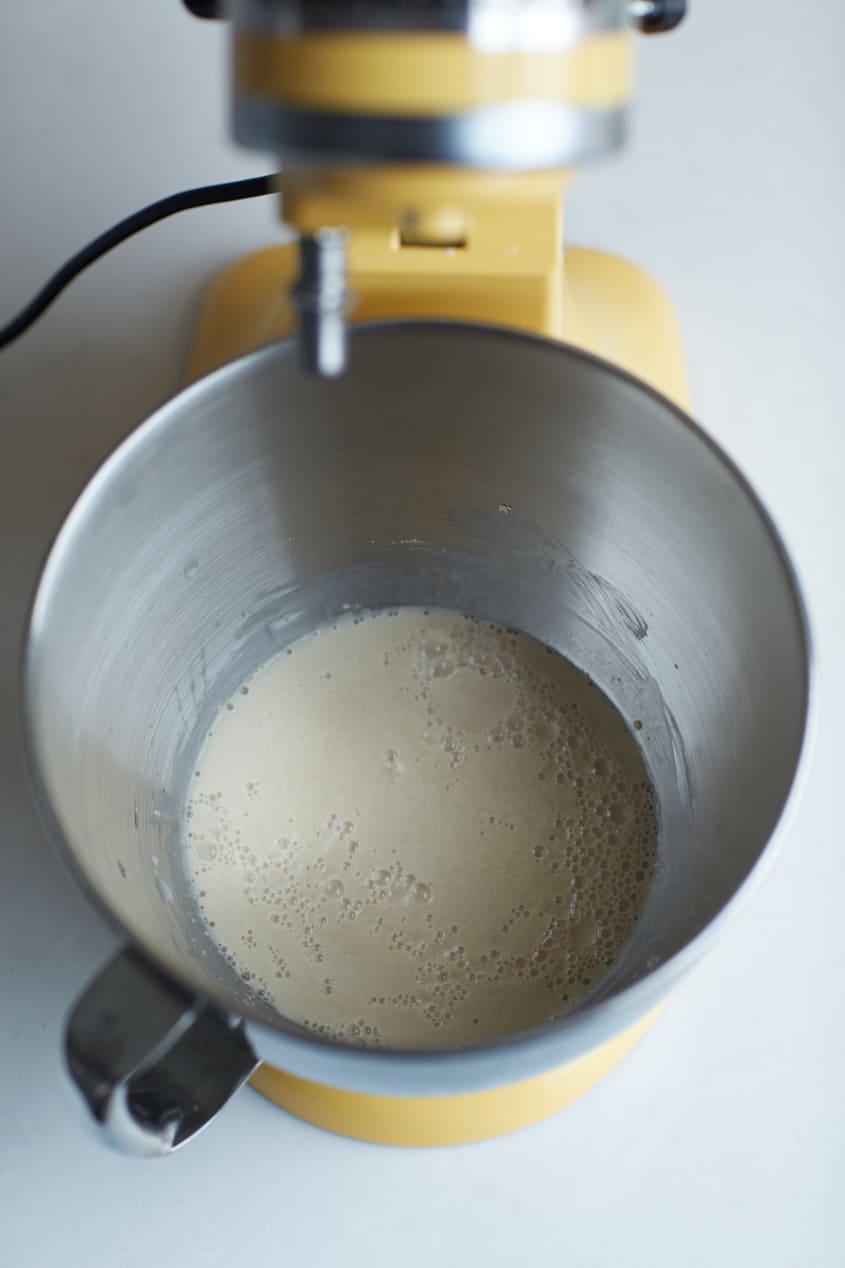
Dissolve the yeast: In the bowl of a stand mixer fitted with a paddle attachment, combine the water, yeast, and sugar and mix at low speed just until blended, 20 to 40 seconds. Let stand in the bowl until the mixture is foamy, frothy, and smells distinctly like yeast, about 5 to 6 minutes.
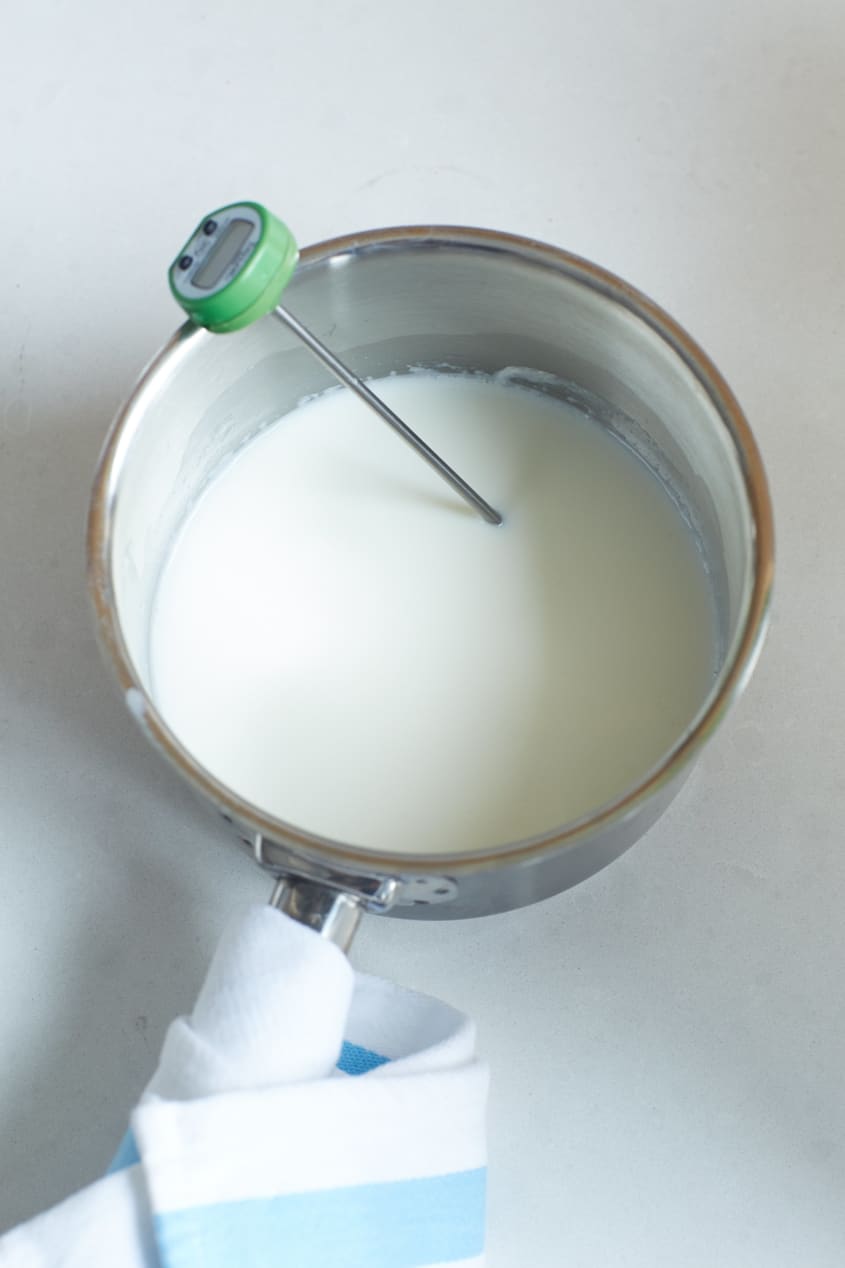
Scald the milk: Heat the milk in a saucepan set over medium-low heat until tiny bubbles form at the edge of the pan, just before it simmers. An instant-read thermometer will read between 180°F and 185°F. Be careful not to let it boil. (If you don't have a thermometer, test it with your finger; it should be uncomfortably hot.) Set aside and let cool to room temperature.
Make the dough: Add the milk, olive oil, and salt to the mixer and mix at low speed just until combined, about 10 seconds. Add the 4 cups flour, 1 cup at a time, mixing after each addition at low to medium-low speed until combined into a homogeneous mass. It will still be a little raggedy and not quite smooth. (Adding the flour cup by cup and mixing after each addition will prevent the flour from puffing up into your face and all over the cabinet.)
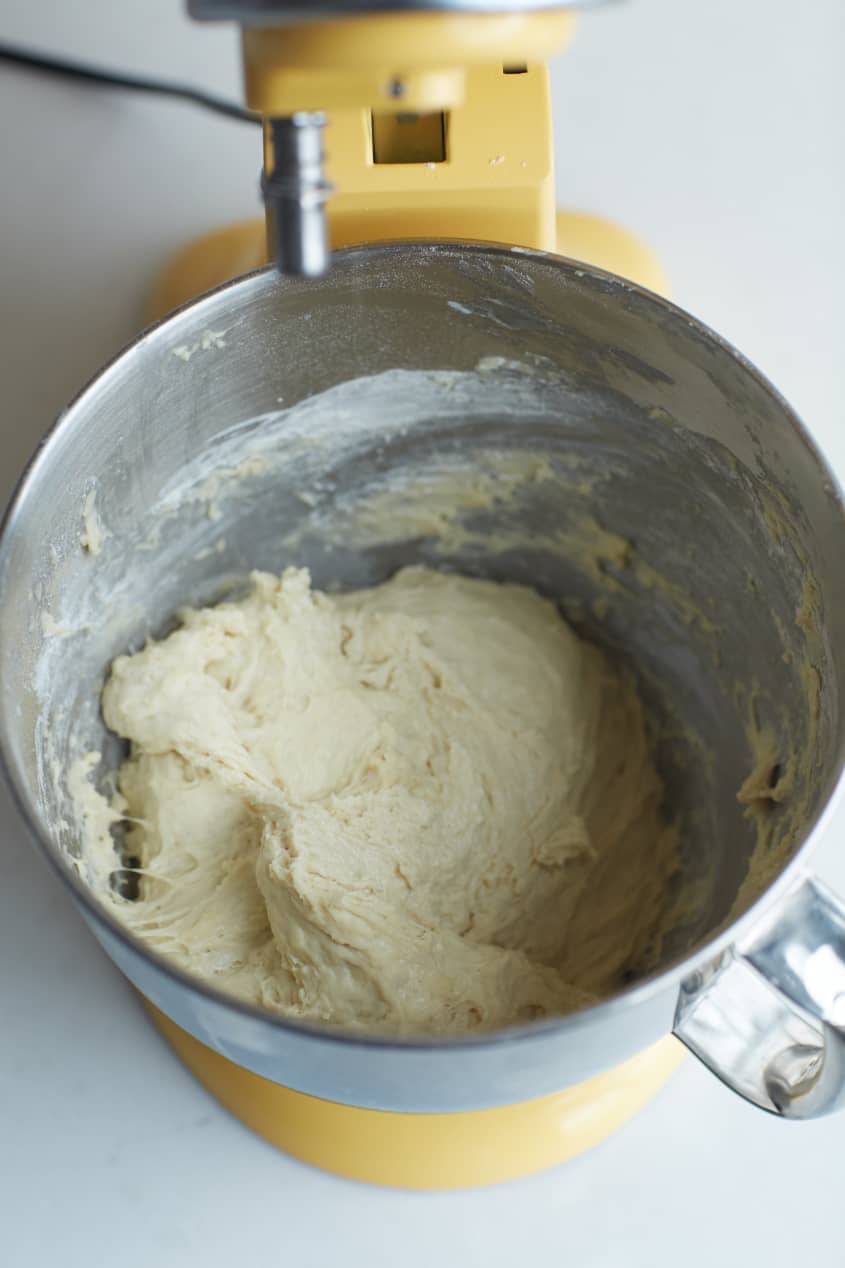
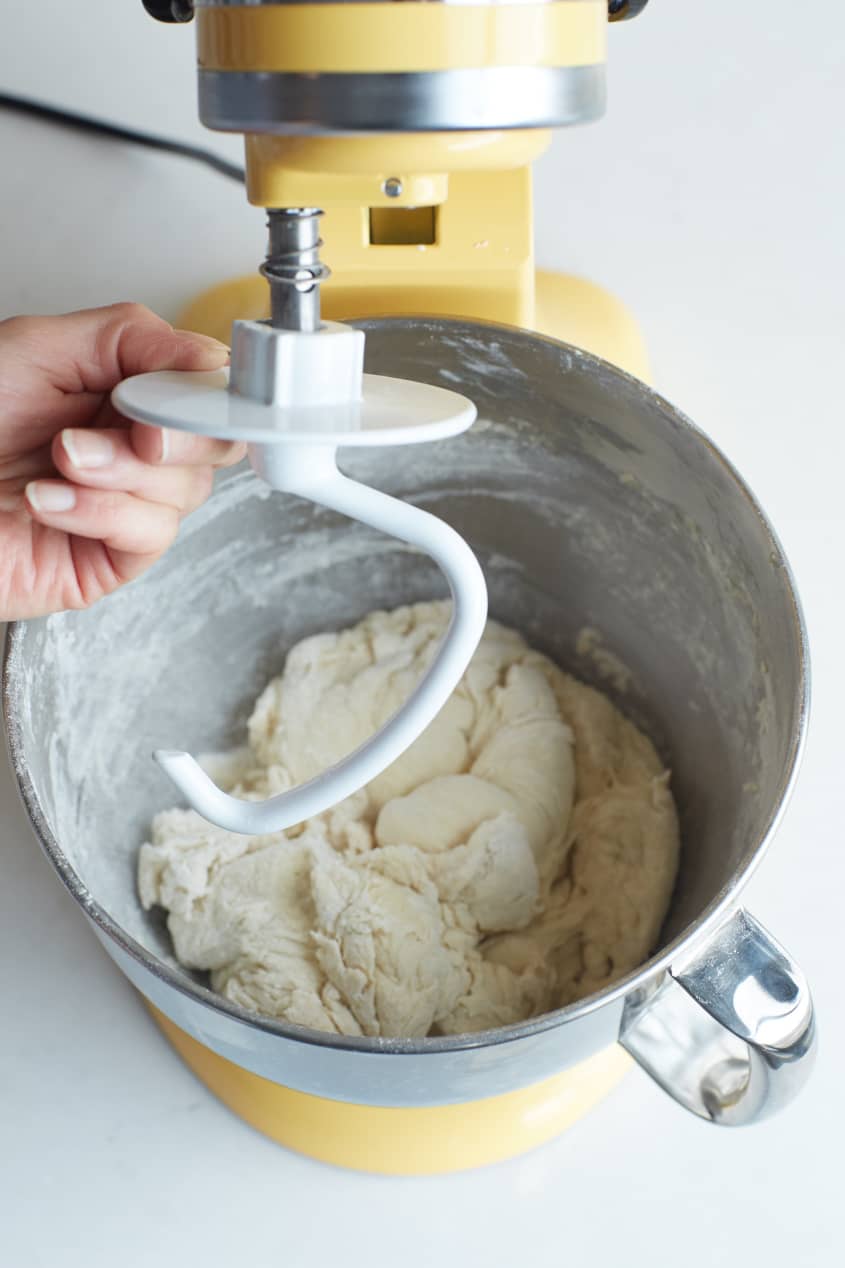
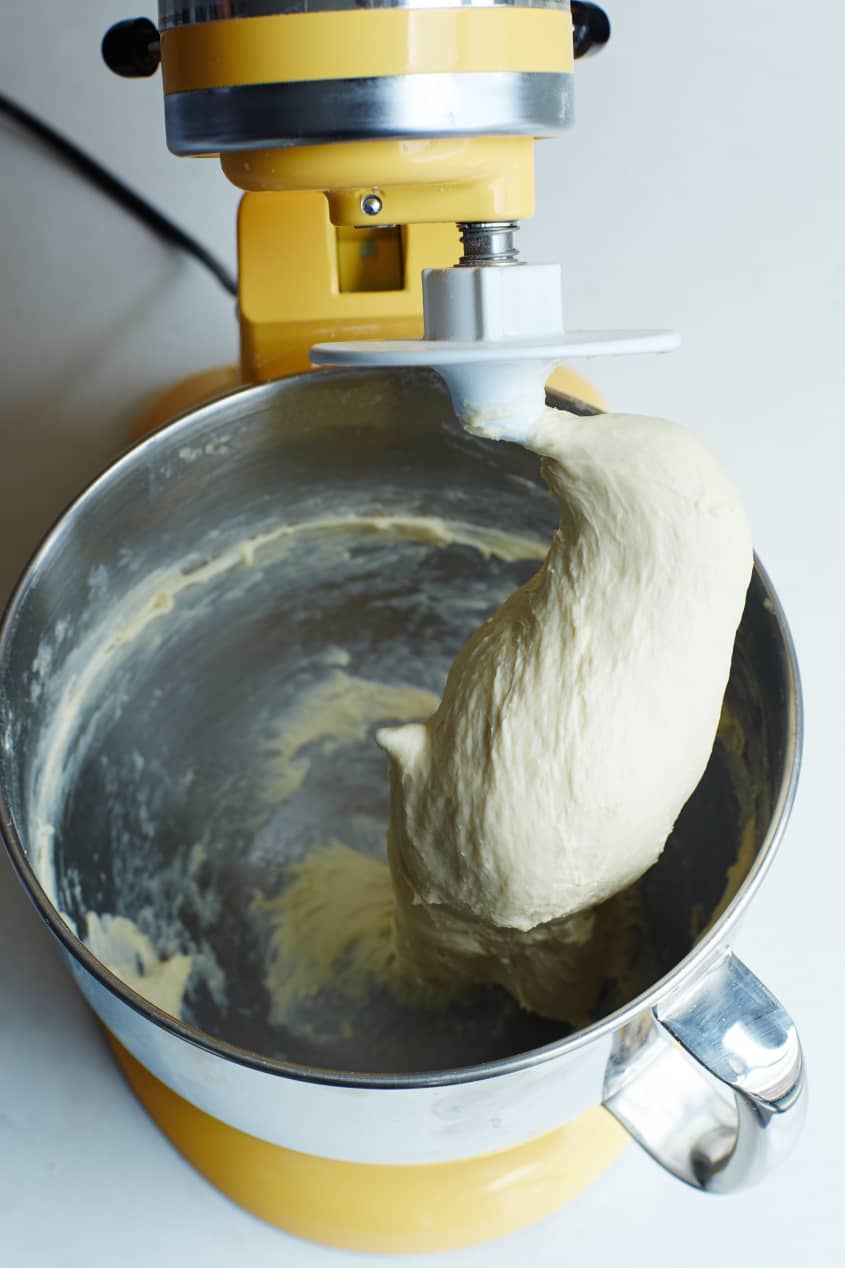
Knead the dough: Scrape the raggedy dough from the paddle into the mixer bowl. Switch to the dough hook attachment. Mix at low speed for about 1 minute. Increase the speed to medium and knead for 5 to 7 minutes. The dough will not be sticky or tacky; nor will it be dry. It will get a bit looser as it becomes smoother. This dough is a great example of the classic smooth and elastic dough. As you knead it, the dough will clear the sides of the bowl.
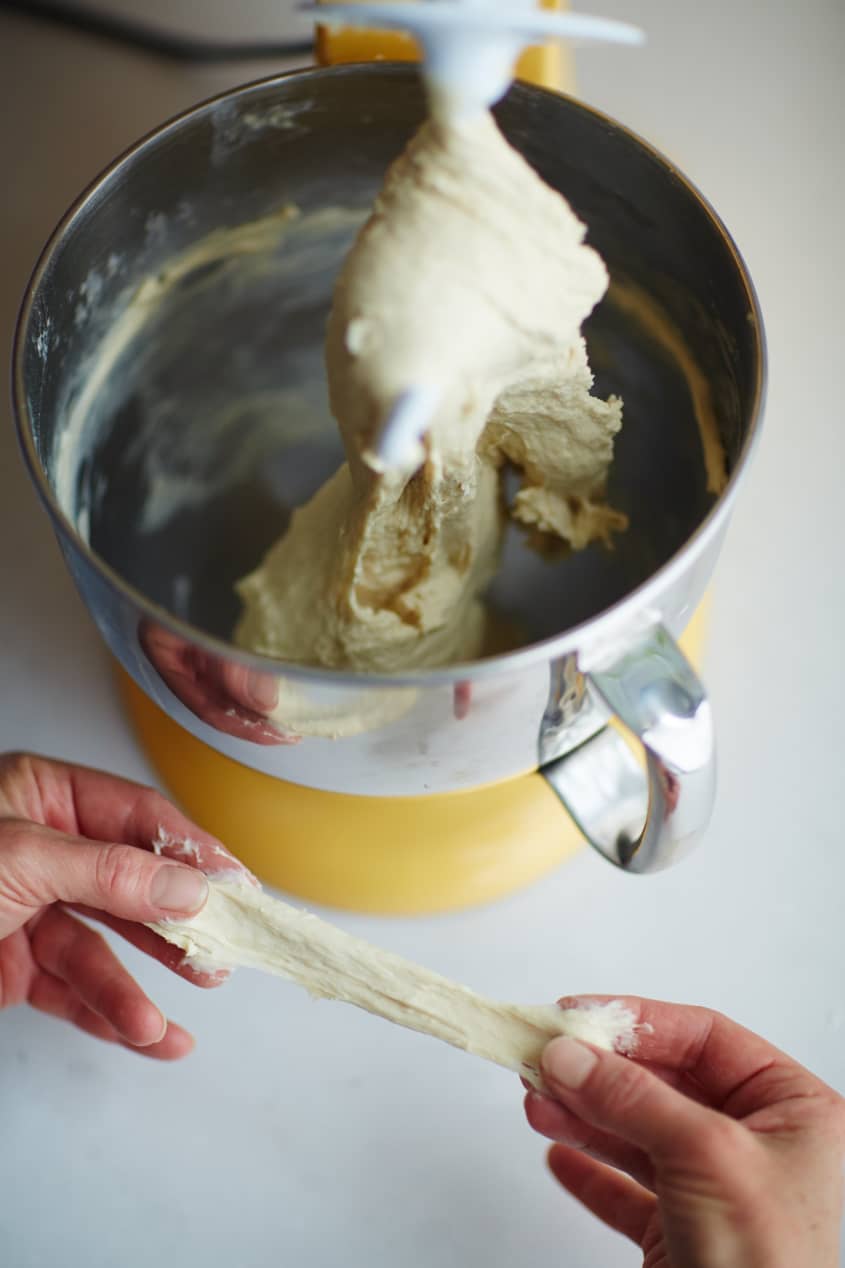
Check the dough: Stop the mixer and pinch off a small piece of dough and gently pull it apart, looking at the center as it stretches. It should not tear easily. It should be just translucent. If it isn't, keep mixing for 1 more minute.
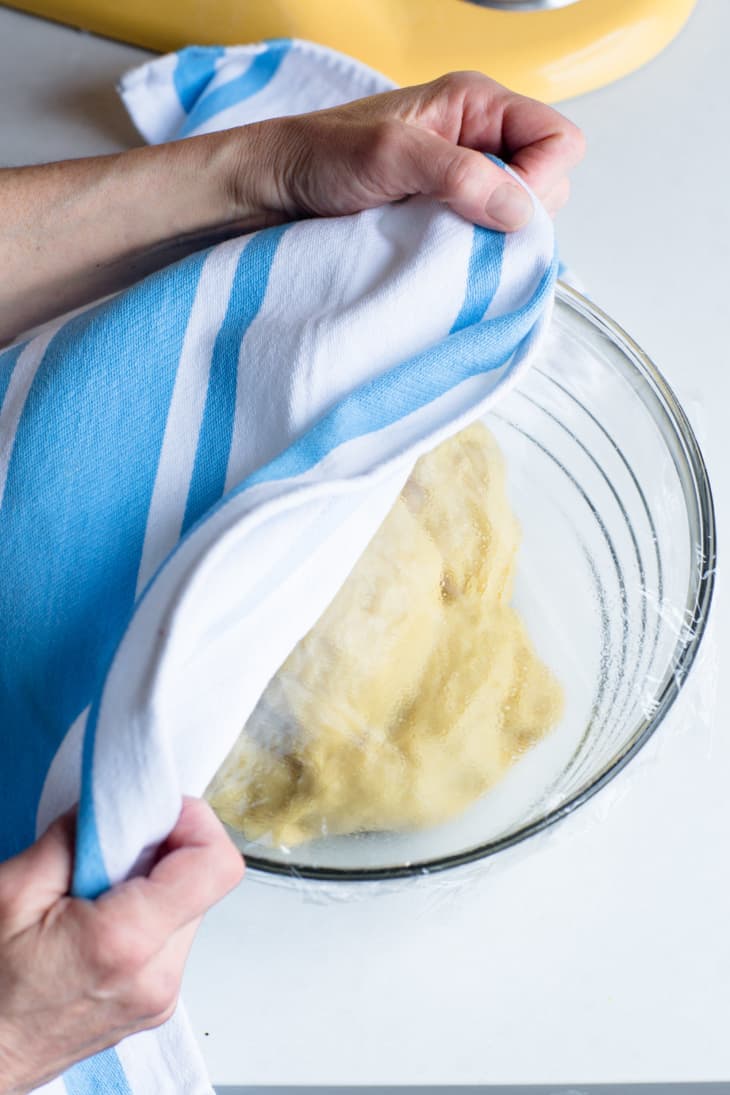
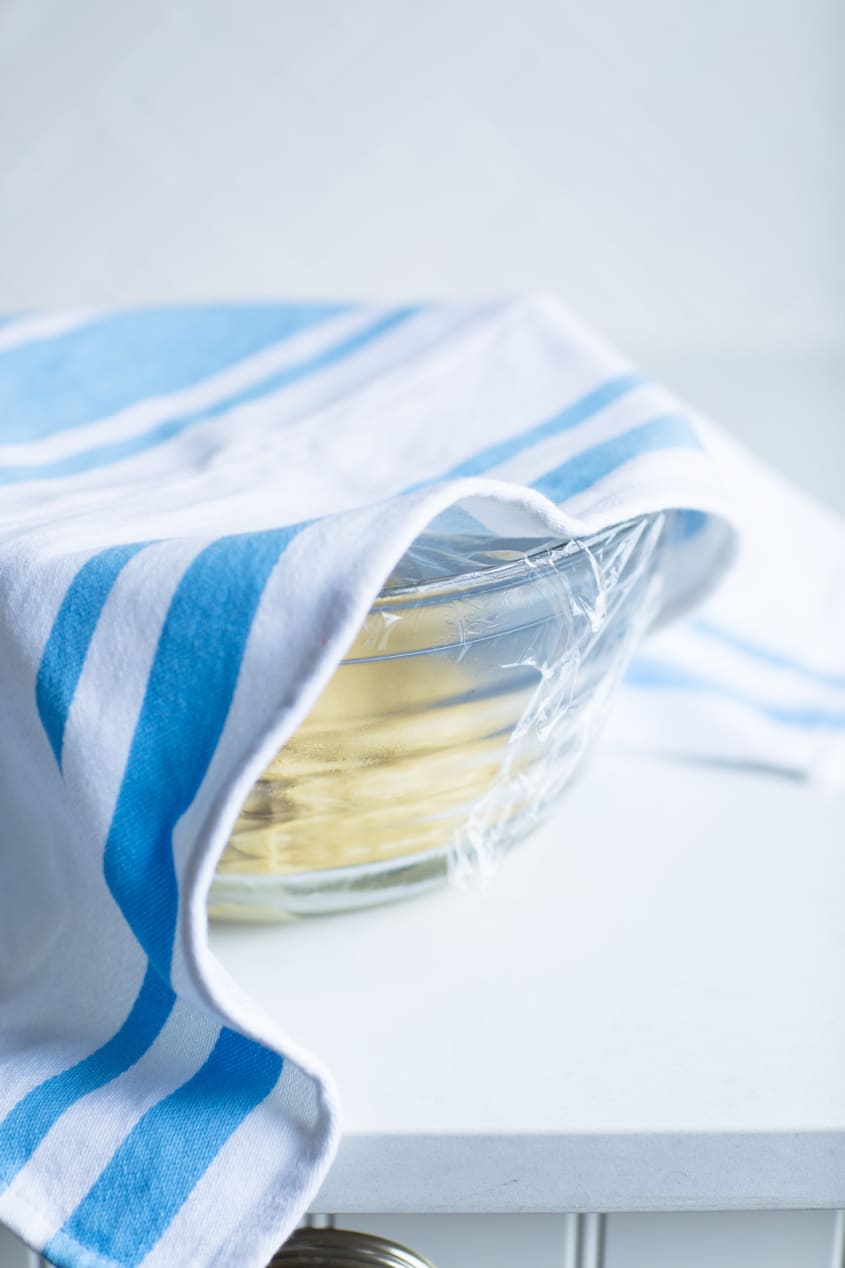
Let the dough rise: Scrape all the dough into a large mixing bowl. Spray nonstick vegetable oil spray on a piece of plastic wrap at least 2 inches wider than the bowl and drape it over the bowl, sprayed-side down. Cover with a large kitchen towel or two and set aside in a warm (between 70°F and 80°F) but not hot undisturbed spot in the kitchen. Allow to rise for 1 to 1 1/4 hours until it has almost doubled in size. (This is not an exact measurement, and a little less rise is a better than a little more.) Remove the plastic wrap and look at the dough. It should be smooth and look puffy.
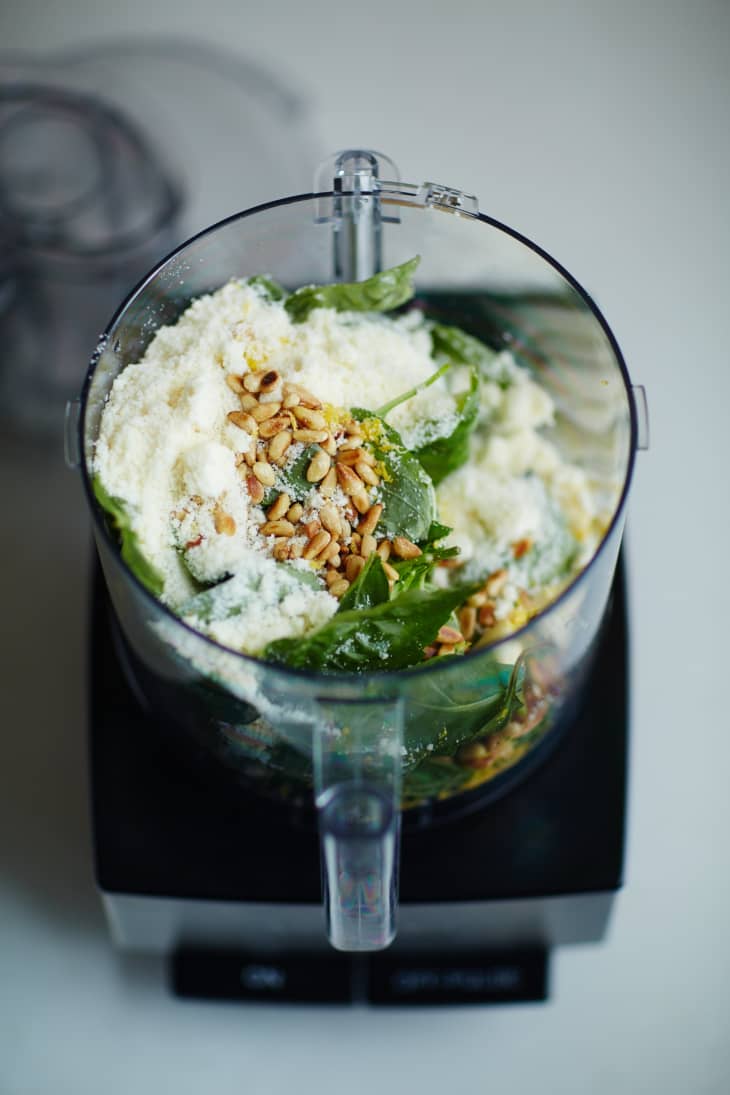
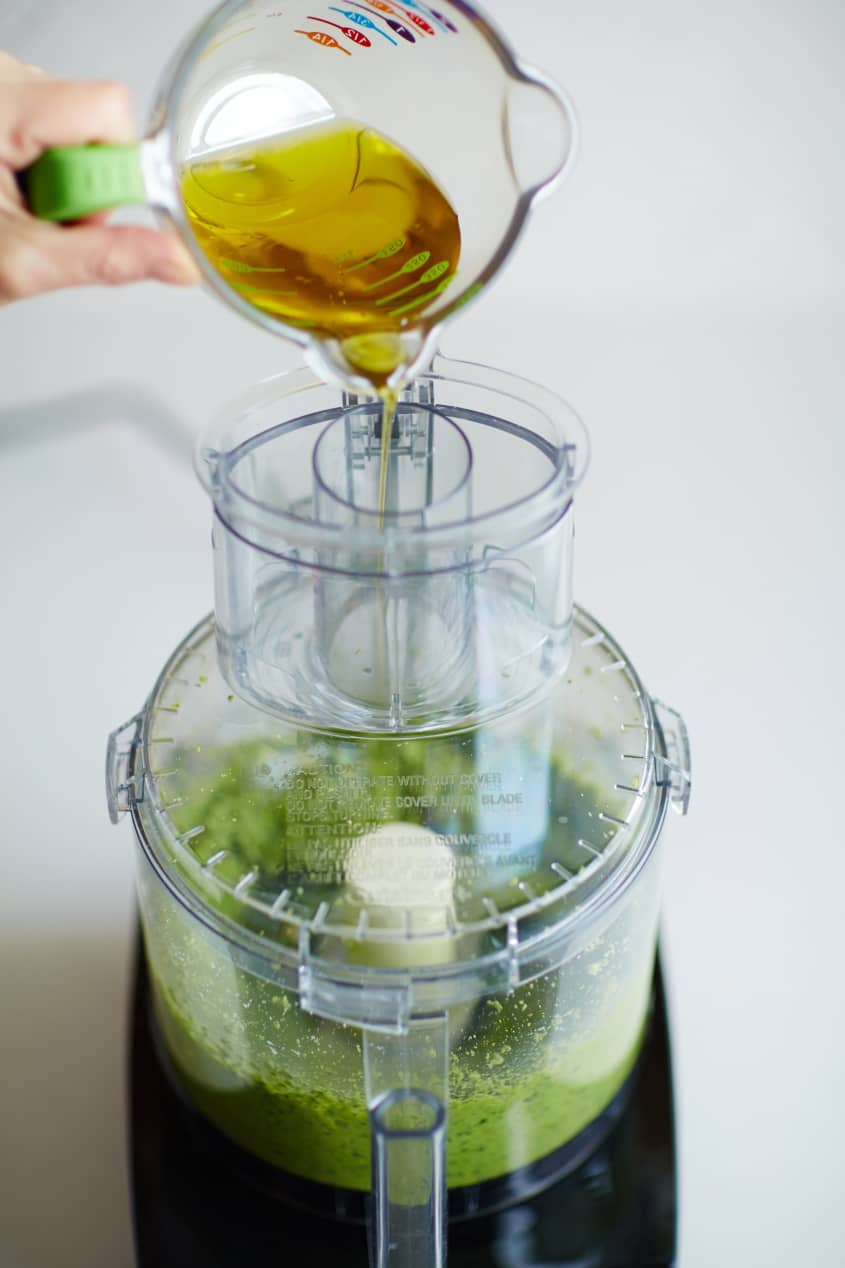
Make the pesto: While the dough is rising, make the pesto. In the bowl of a food processor fitted with a blade, combine the basil, garlic, Parmesan cheese, lemon zest, and pine nuts. Cover and process in 3 to 4 (45-second) pulses until it is puréed and looks slushy; the leaves should be fully broken down. Remove the plunger from the feed tube, turn the food processor to processing (not pulsing), and with the processor running, slowly drizzle all of the olive oil through the tube. Stop the machine, and with a silicone spatula, scrape the pesto mixture into a container, working around the blade carefully. Cover and refrigerate. This can be done up to 2 days in advance and brought back to room temperature before using.
Prepare to bake: Line a 12x18-inch rimmed baking sheet or sheet pan with a layer of parchment paper or a nonstick silicone pad. Set aside. Preheat the oven to 400°F. Cut 2 (9x12-inch) sheets of parchment paper.
Make an egg wash: Whisk the egg and water in small bowl and set aside.
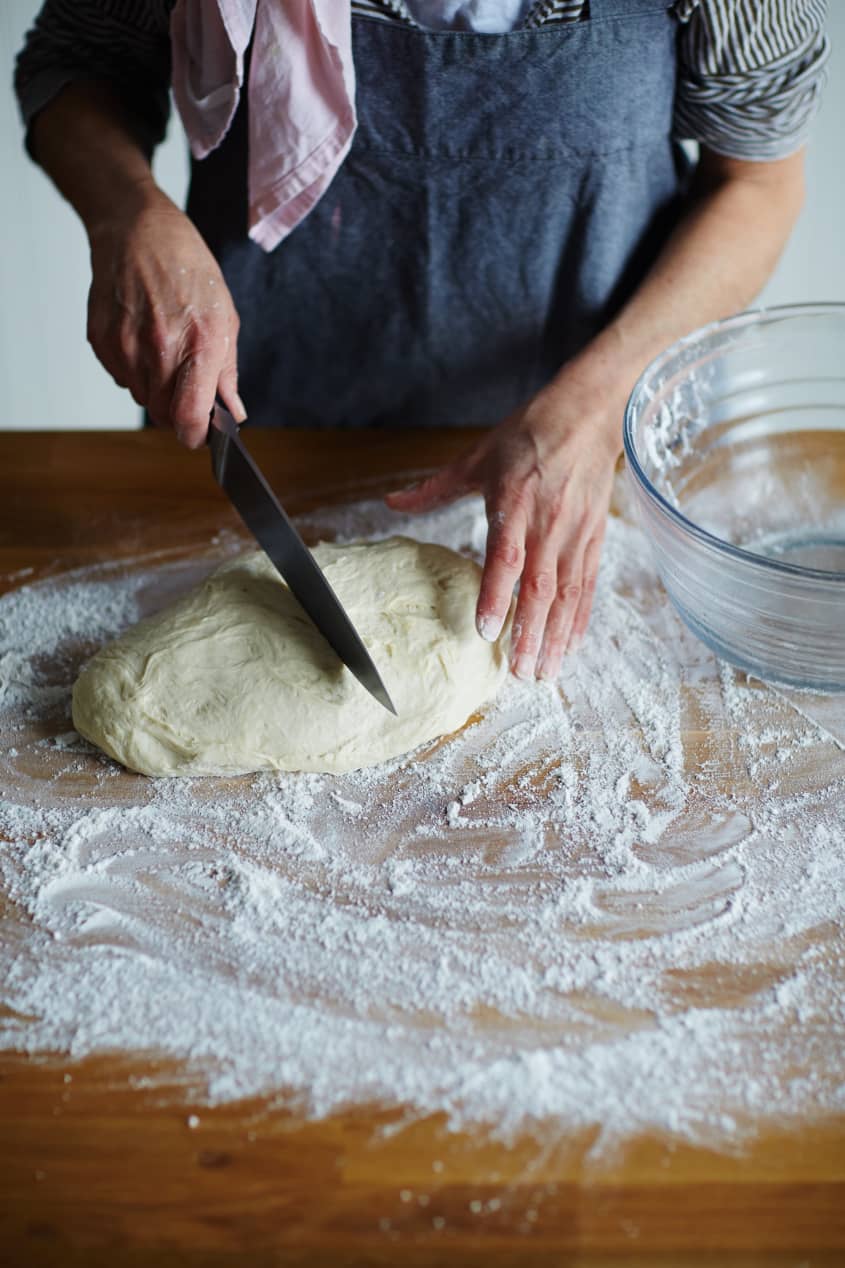
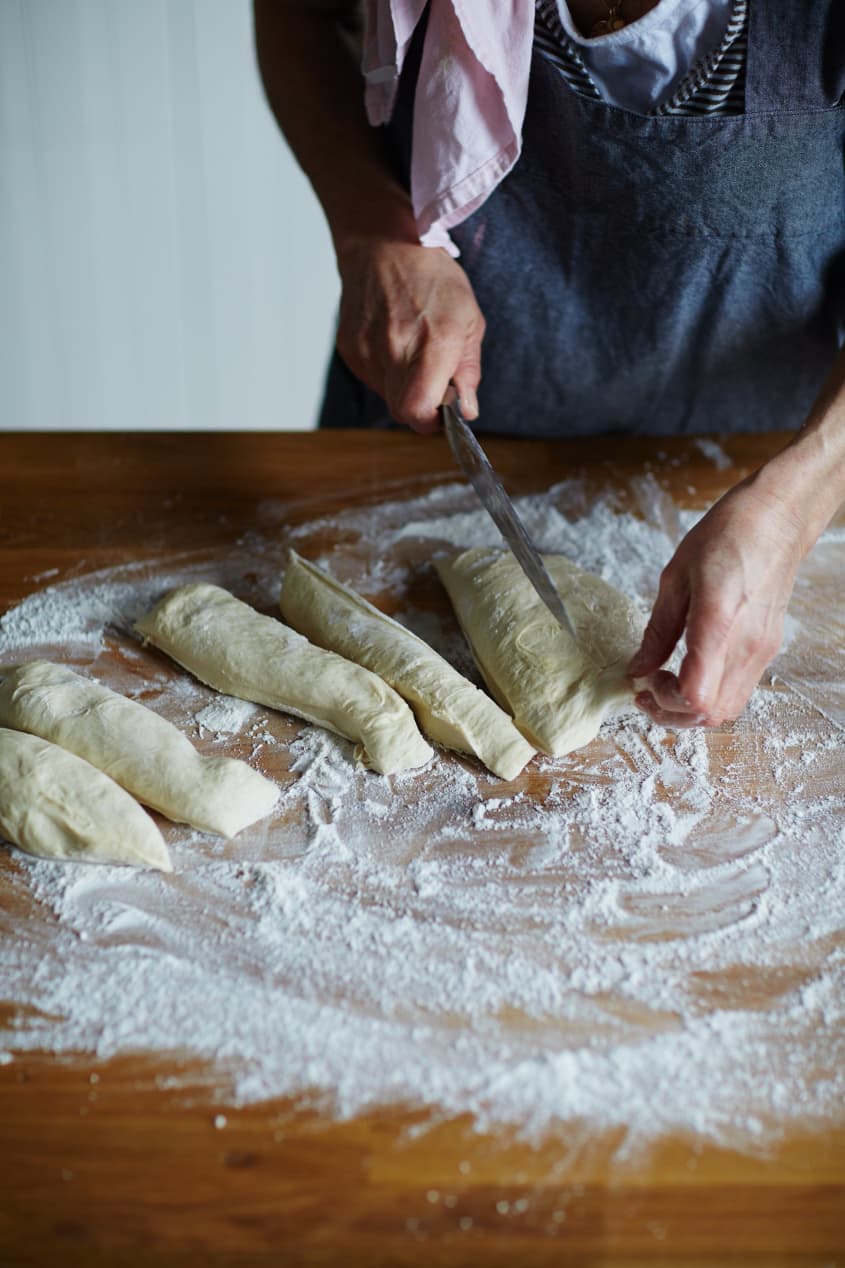
Divide the dough: When the dough has risen, lightly flour a work surface. Turn the dough out onto it and divide it in half. Cut each half into 3 equal pieces.
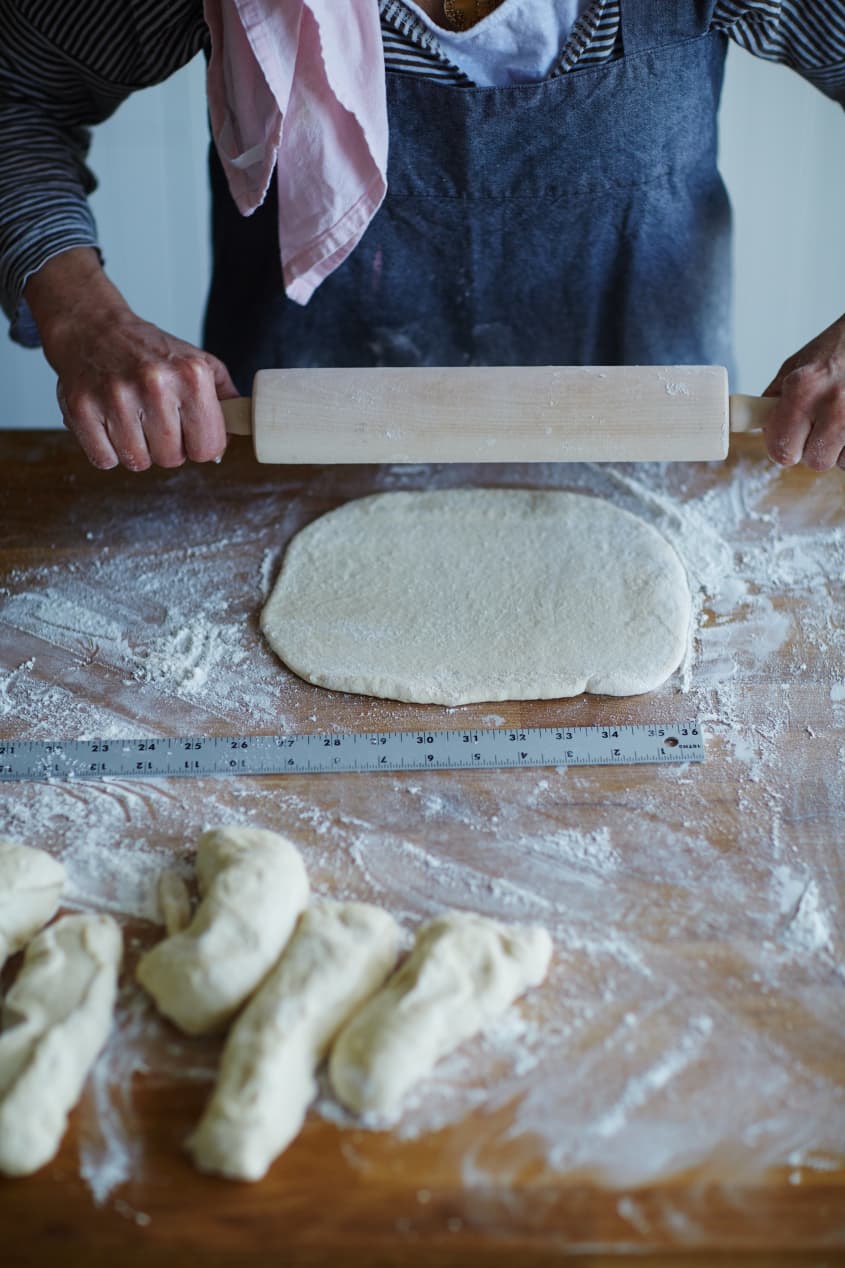
Roll out the dough: Lightly flour a rolling pin. Roll one piece of dough into a rough 8-inch square. It should be about 1/8 inch in thickness.
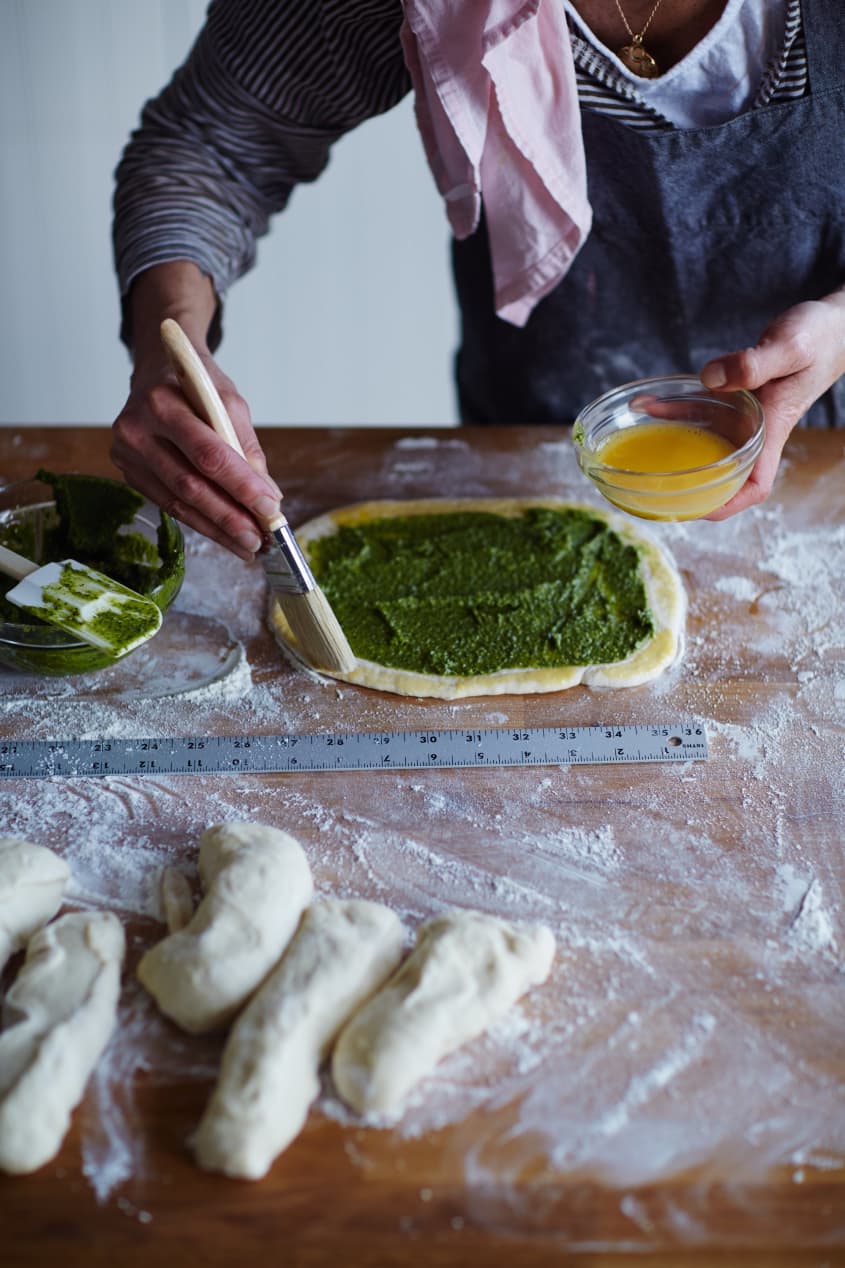
Spread the pesto on the dough: Use a silicone spatula to scoop about 3 tablespoons of the pesto. Leave a 1/2-inch border uncovered on the side closest to you. Use a pastry brush to brush a small amount of the egg wash over the exposed edge.
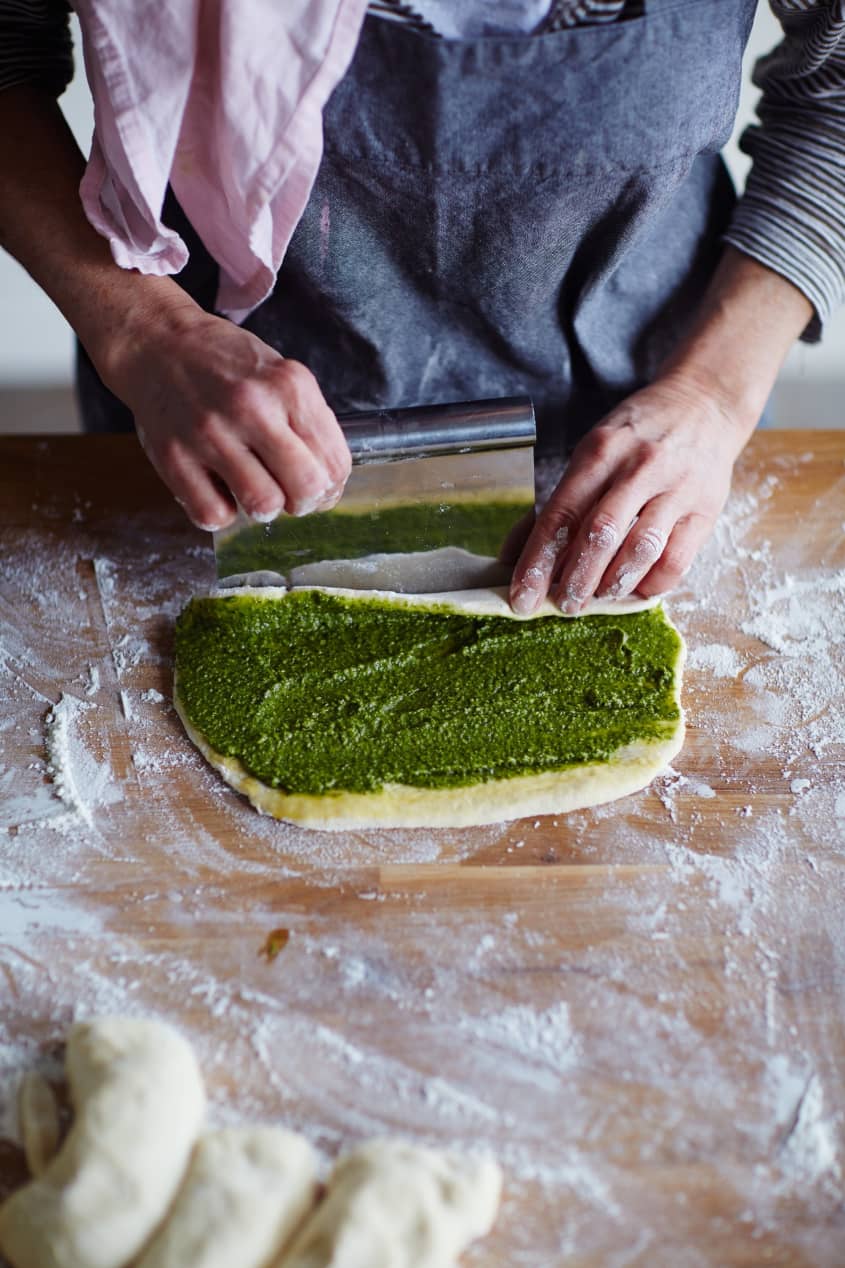
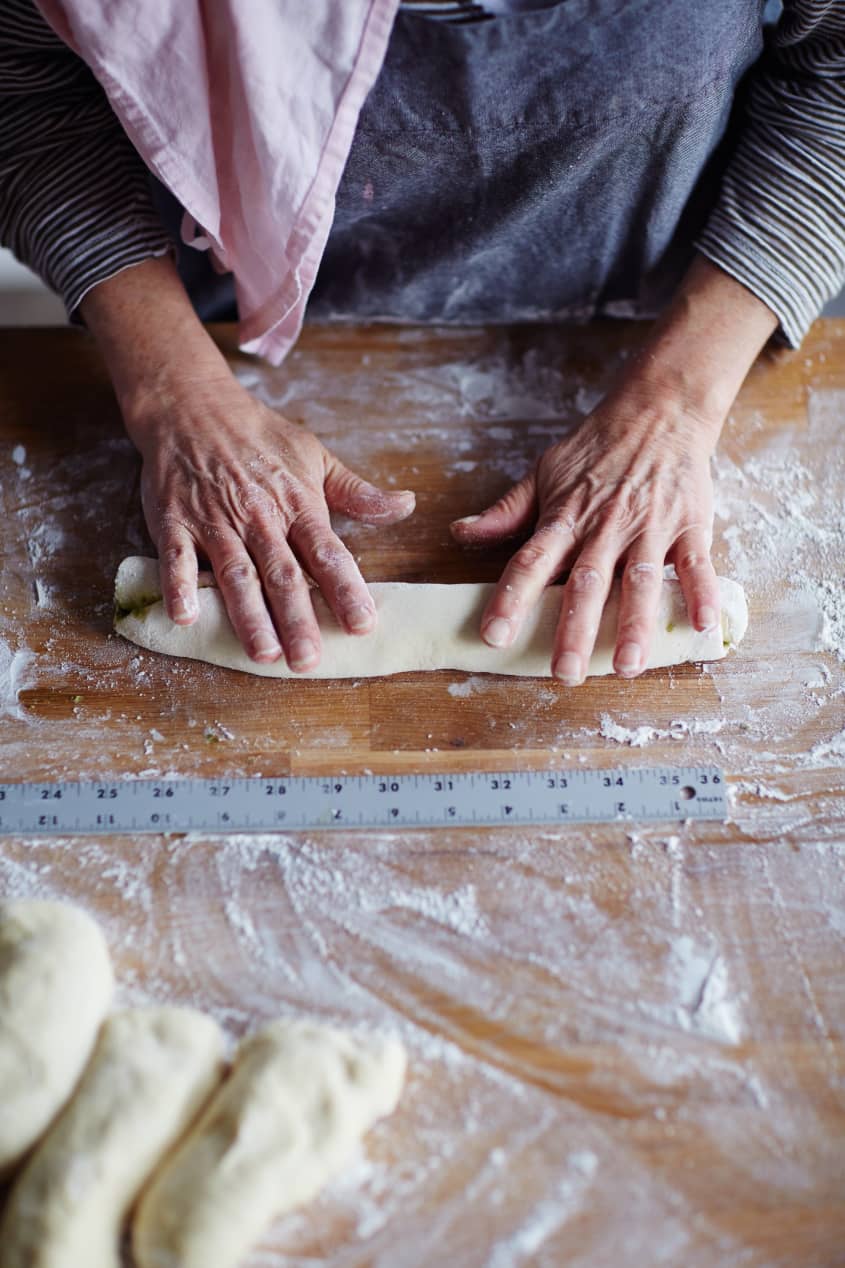
Roll up the dough: Use a pastry scraper or a spatula to help you lift up the pesto-covered edge and roll it up, jelly roll-style, as tightly as you can into a tube, toward the exposed edge. Pinch the seam closed with your fingertips. Gently roll the tube back and forth over the work surface until it spreads lengthwise to about 10 inches long.
Cut and roll the remaining dough: Cover the first tube with plastic wrap and set aside while you repeat with the remaining dough and pesto, working with one piece of dough at a time. You will end up with 6 tubes, 3 for each loaf.
Slash the tubes: Line up 3 rolled tubes on one of the prepared sheets of parchment, positioning the thin ends toward you. With a very sharp, long knife, make a lengthwise slash through each, cutting a deep slit halfway down the depth of the tube; make sure not to cut all the way through to the bottom.
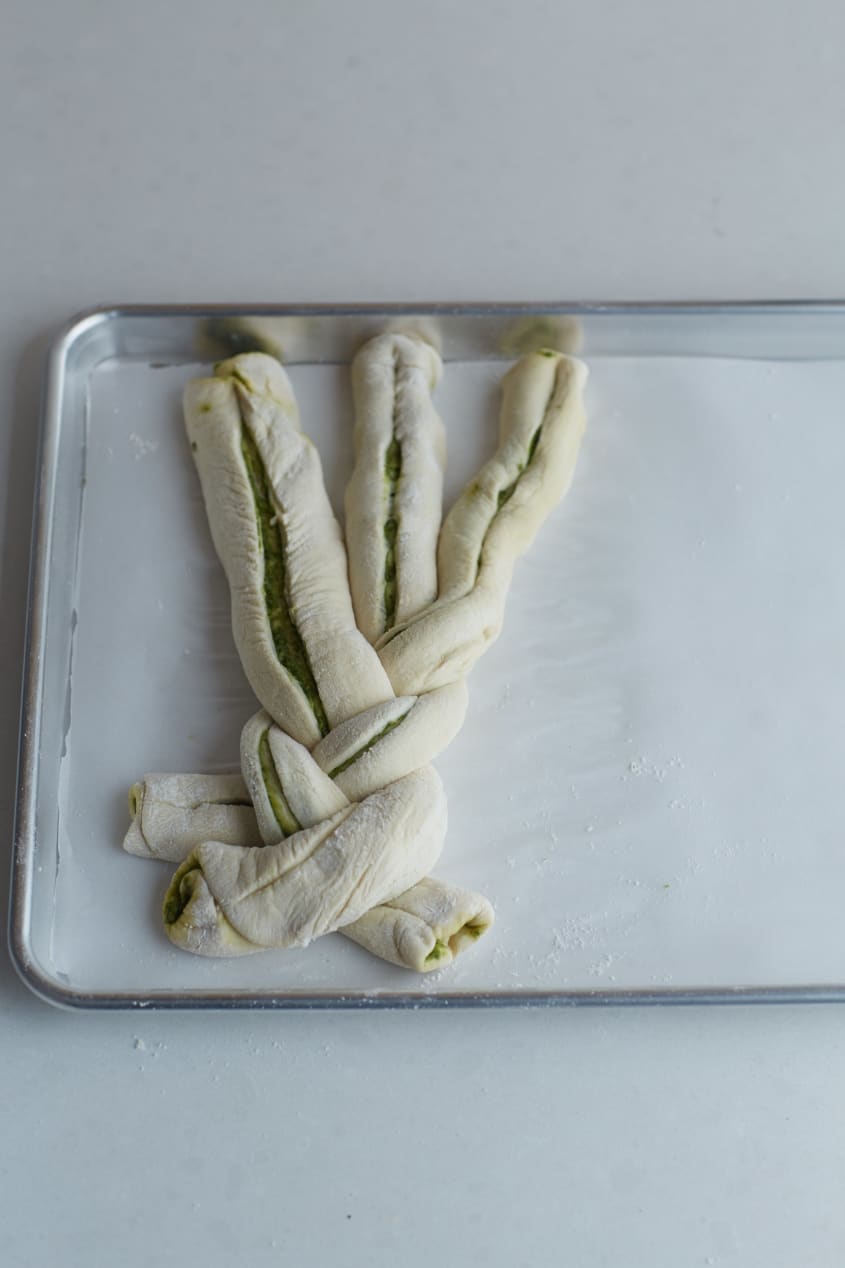
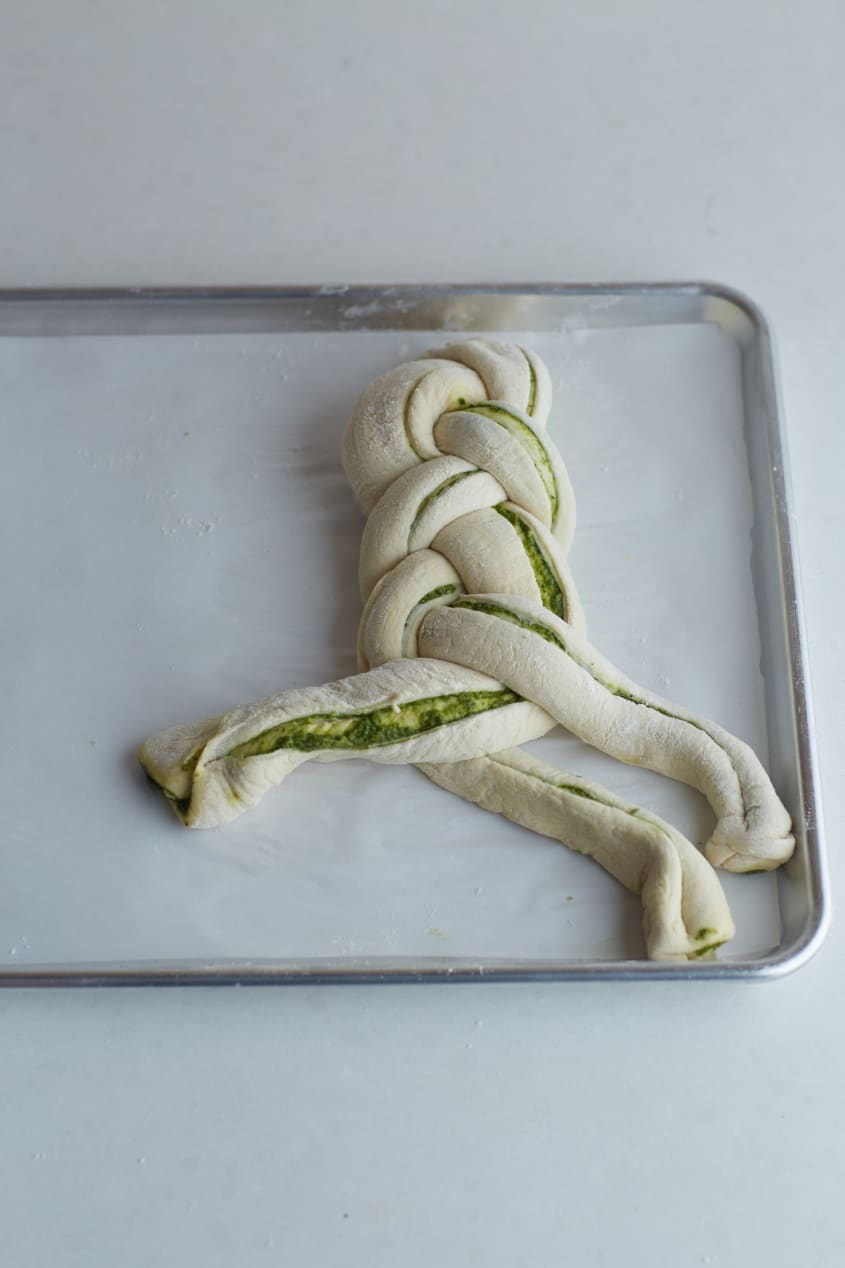
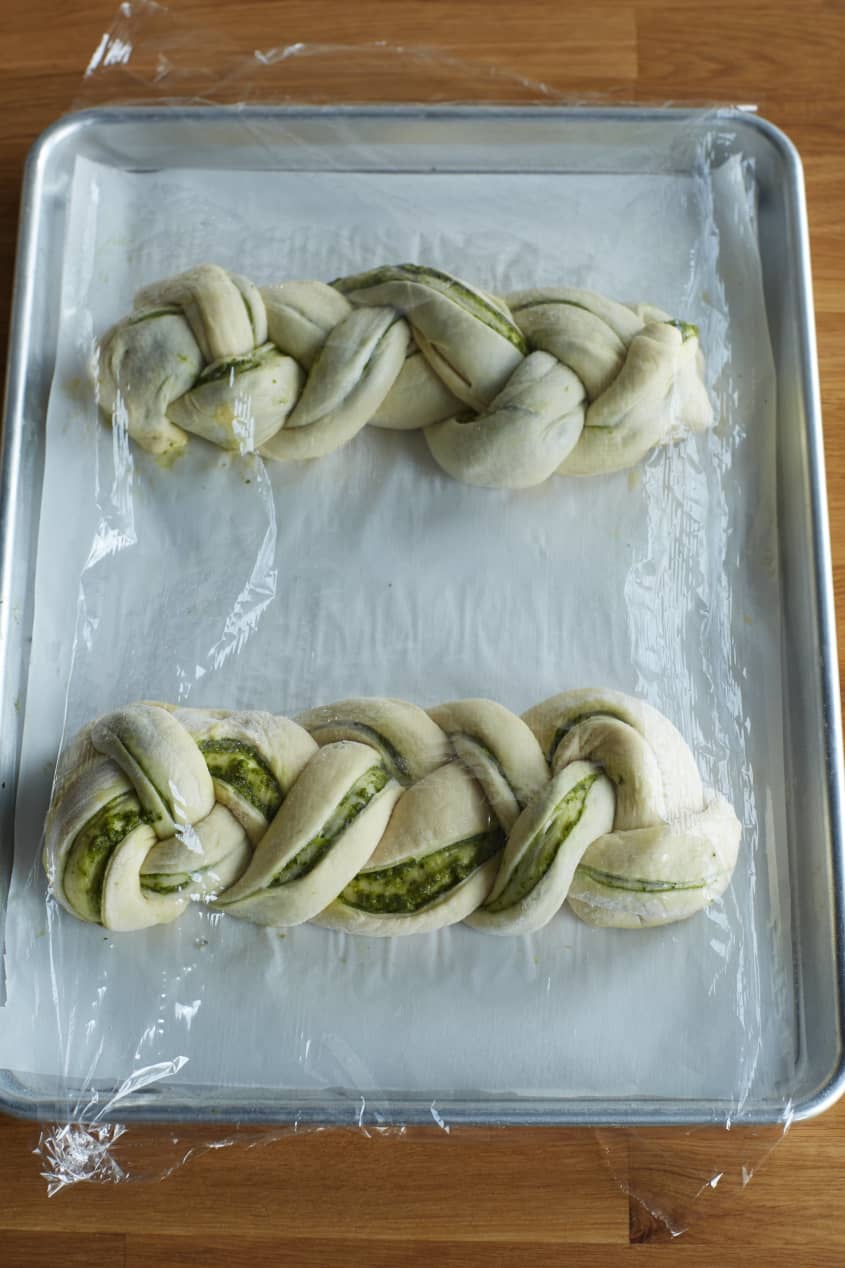
Braid the first loaf: Roughly measure the center point of the tubes (about 5 inches from the ends). Working outward from that point, braid the tubes together, crossing one of the outer tubes gently over the middle one. Then cross the other outer tube up and over the new middle one. Repeat, working your way down to the end. Half of the tube should be braided. Then turn the parchment paper around and braid the other side, from the center point to the end, so that the entire loaf is braided. Tuck under ends if desired. Some pesto may ooze out. Set aside.
Braid the second loaf: Place the remaining 3 tubes on a clean piece of parchment and repeat the braiding process as described above.
Place the loaves on the pan: Transfer the loaves, still on their parchment sheets, to the prepared baking sheet; position them side by side width-wise on the pan, with at least 3 inches between them at every point. To allow enough room, you might have to angle them so that one is a few inches closer to the bottom and one is a few inches closer to the top. With kitchen shears, cut any excess parchment paper or any paper that touches the other loaf.
Let the braided loaves rise: Spray 2 pieces of plastic wrap with nonstick vegetable oil spray, cover the loaves, sprayed-side down, and let the bread rise for 30 minutes. It will rise, but it will not quite double in size.
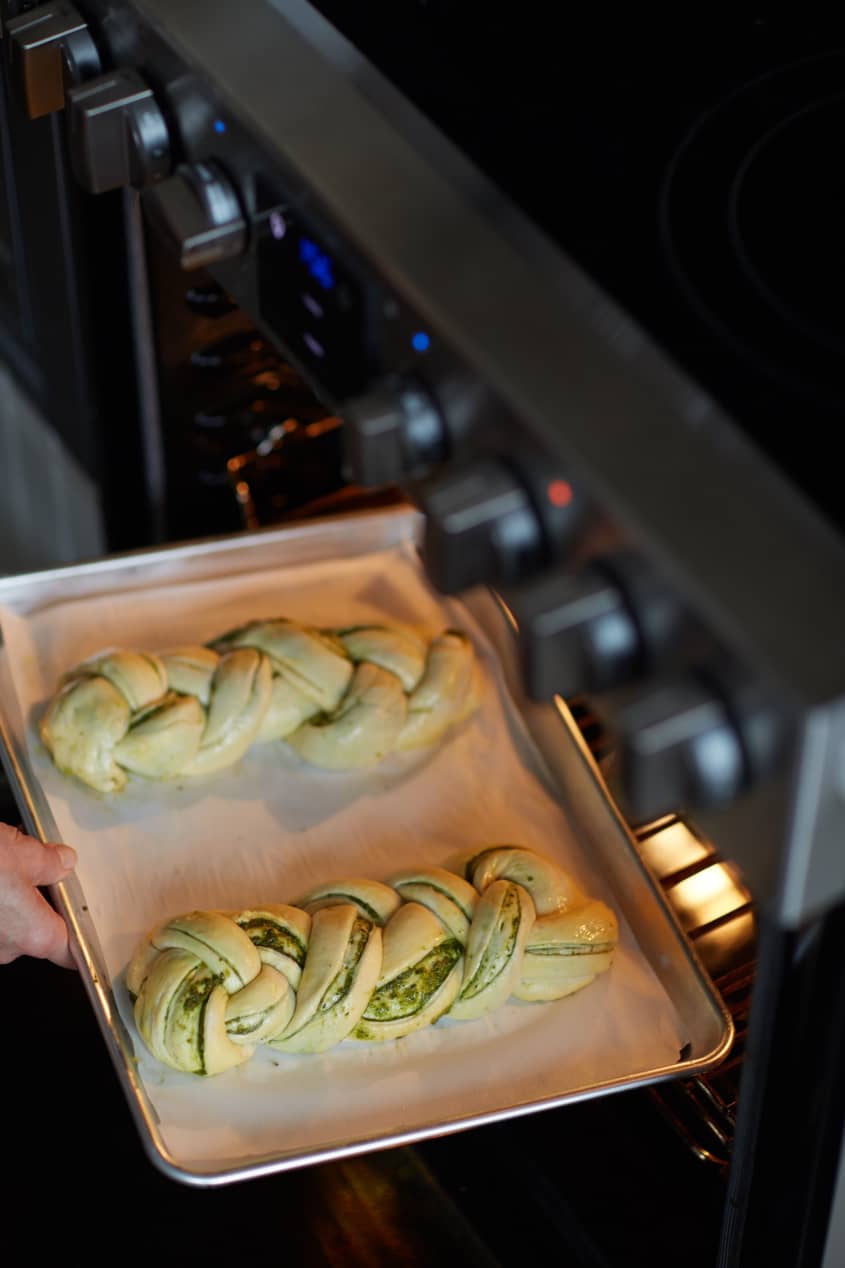
Prepare the oven: Meanwhile, remove the top rack from your oven to make sure that there is enough room for the bread to bake and expand upward. Position the center rack as much in the middle of the oven as possible. This will ensure even baking. Preheat the oven to 400°F.
Brush with egg wash: When the loaves have risen, uncover and brush well with the egg wash.
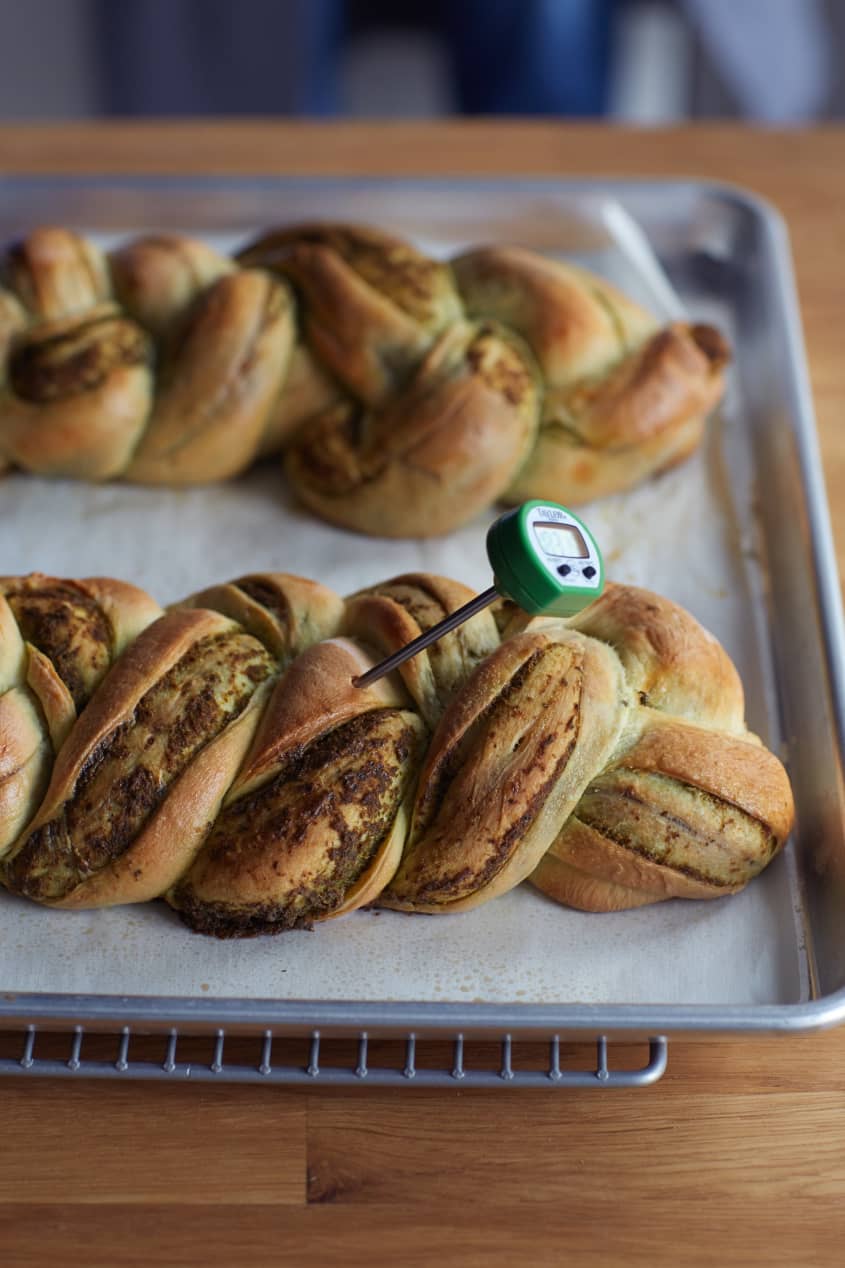
Bake the pesto bread: Bake for 10 minutes. Reduce the oven temperature to 350°F. Turn the pan 180° from its original position (in other words, back to front) to ensure even baking. Bake for an additional 30 to 35 minutes, until the bread is a warm brown and crusty, and an instant-read thermometer inserted into the bottom of the loaf reads between 200°F and 205°F. If you rap it gently on the bottom, it should sound quite hollow.
Let cool: Cool in the pan for 10 minutes. Then transfer the loaves to a rack to cool completely before serving. As tempting as it is, the bread needs to cool before slicing for best texture. It is still cooking a little, even though it's out of the oven.
Recipe Notes
Premade Pesto: You can use pre-made pesto BUT you will need to add in about another 1/3 cup freshly grated Parmesan cheese. Start by adding 1/4 cup and work your way up to about 1/3 cup, adding a few teaspoons a time, mixing until you get a dense, pasty pesto. Most pestos are too thin and will run right out. It has to be a stiff pesto.