How to Make Cutting Board Cream in a Few Simple Steps

You’ve more than likely got some wooden cutting boards and tools in your kitchen that could use a little TLC. It’s time to give them the royal treatment with some homemade cutting board cream! Our mineral oil-free version is made from just two ingredients, and it comes together right in the Mason jar in which it’s stored. Best of all, the golden-yellow salve smells like creamy, dreamy honey, and it’ll moisturize your hands as well as your spoons!
Homemade spoon butter (also known as butcher block or cutting board cream) is a great thing to keep around. Once applied, it moisturizes and protects wooden surfaces such as butcher blocks, cutting boards, salad bowls, spatulas and spoons, and any other wooden surfaces in your home. This homemade version is made with sunflower oil, as opposed to mineral oil, so it’s all-natural and petroleum-free.
How to Make DIY Cutting Board Cream
The Right Beeswax to Use
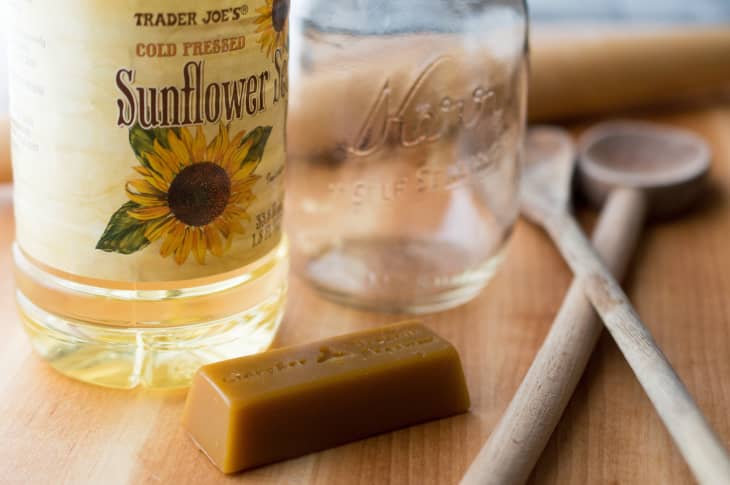
Beeswax is simply the melted, filtered wax from honeycombs. It’s sold in small pellets, one-ounce bars, and larger-sized molded shapes as well. Make sure to purchase a “natural” variety of beeswax, labeled as food- and/or cosmetic-grade. It’ll give your spoon butter its lovely yellow color and lends a natural honey fragrance.
Where to Buy Beeswax
- Organic Beeswax Pellets, $6.99 for one pound
- Food-Grade Beeswax, $15 per one-pound block at Marshall’s Farm
- Filtered Beeswax Block, $21.95 per bar
The Best Oil to Use
In addition to beeswax, you’ll need a neutral vegetable oil that’s liquid at room temperature and fairly odorless. I like to use cold-pressed sunflower seed oil — it’s inexpensive and easy to find (I got mine at Trader Joe’s), and comes highly recommended by a reader who fashions wooden kitchen wares of her own. Another option is linseed (aka flaxseed) oil, which you can find at most health-food stores for a few dollars more.
To make the spoon butter, all that’s required is a little heat and some vigorous stirring. Placed in a pot of barely simmering water, a Mason jar acts as a double-boiler and storage vessel all in one, allowing the wax and oil to melt together.
Instructions
Makes about 3/4 of a pint
What You’ll Need
- 1 quart water
- 2 ounces natural beeswax
- 8 ounces cold-pressed sunflower oil (or other neutral vegetable oil)
- 2-quart saucepan
- Pint-sized Mason jar
- Pair of wooden or bamboo chopsticks
Instructions
- Combine the beeswax and oil: Place the bars of beeswax in the Mason jar, and pour in the sunflower oil.
2. Heat water: Heat a quart of water in a small (2-quart) saucepan over medium heat.
3. Submerge the Mason jar into the water: When the water begins to simmer, turn the heat down to low. Gently lower the Mason jar into the water, taking care not to splash any water into the jar.
4. Let the wax melt: After 10 minutes, turn off the heat but leave the pot on the stove. Let the jar sit in the water for 10 more minutes. As the wax melts, use the chopsticks to break up the large pieces, helping them to melt more quickly.
5. Remove the jar: Remove the jar from the water. All of the wax should have melted into the oil, combining into a golden, translucent liquid. If there are still pieces of solid wax, give the mixture a good stir with the chopsticks until thoroughly melted.
6. Let the mixture sit, then stir: Let the jar sit for 20 minutes. The liquid will have begun to cloud over a bit. Give it a stir, let sit for another 20 minutes, then stir a final time to ensure an evenly mixed, creamy spoon butter.
7. Cool at room temperature: Leave to cool to room temperature, then cover and store for up to 6 months.
And that’s it, really! Procure beeswax and oil, then heat and stir. Now you’re ready to give all of your wooden kitchenwares a dose of much-needed moisture, adding a lovely sheen and extending their life for years to come. For more information, learn how to use your DIY cutting board oil to maintain your wooden kitchenware in just 5 minutes a month.